Select Your Country/Region

Europe

  • Österreich Deutsch
  • France Français
  • Italy Italiano
  • España Español
  • Denmark English
  • Norway Italiano
  • Sweden English
  • The United Kingdom English
  • Portugal English

North America

  • The United States English
  • Canada English

Oceania

  • Australia English
  • New Zealand English

Asia

  • 中国大陆 简体中文
  • 日本 日本語
  • South Korea Korean
  • Saudi Arabia Arabia
  • United Arab Emirates Arabia

Africa

  • South Africa Afrikaans
  • Egypt Egypt
  • Brazil Español

Tourist

Not logged in

Sign in
RoboUP

RoboUP

2024/05/12 23:33

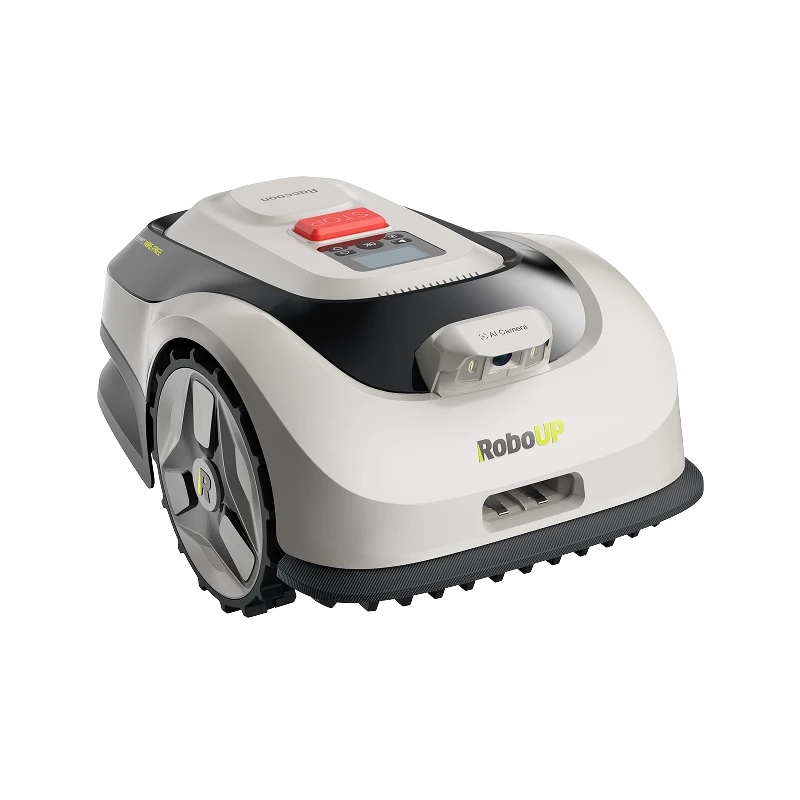
RoboUP T1200 Pro, Ideal For Complex Gardens

Wondering how the T1200 Pro handles large and complex gardens? Here are some details about its adaptability that you need to know. Check them out and see if it matches your lawn!
1. Tree coverage along the lawn edge: <10%
2. Tree coverage in the middle of the lawn: <20%
3. Maximum edge slope: 15% (8.5°)
4. Maximum slope in the middle: 45% (25°)
5. Maximum lawn area: <1200 square metersNarrow pathway width: >1 meter
6. Length of narrow pathway: <10 meters

Robot Mower

0

1

RoboUP

RoboUP

2024/05/12 23:17

RoboUP T500, Ideal Mower for Simple Gardens

Ever wanted to trim automatically your lawn without spending loads on an over-powered robot mower? Meet RoboUP T500, your solution for small and simple gardens!
Tailor-made for lawns up to 500m². Whether you have trees lining your lawn or narrow lanes to navigate, the T500 handles it all with ease. Explore the T500 today and experience hassle-free lawn maintenance like never before.

Robot Mower

0

1

RoboUP

RoboUP

2024/05/12 23:13

Installation Guidelines of RoboUP RTK Reference Station

Ensure precise navigation and optimal performance for your robot mower! The RTK reference station transmits data to correct the mower's positioning for it to navigate smoothly. This means that the location you choose to set up your RTK is extremely important as it directly dictates how well your mower performs!

Follow these 4 steps to set up your RTK Reference Station:
1. Securely attach the poles.
2. Connect the cables.
3. Screw on the RTK Module.
4. Place your RTK reference station in an open area.

*Note: Finding an open area with less trees is crucial for your mower's performance.

So go ahead and grab your RTK module now, set it up and share your experience with us! #RoboUP

How-to Install RTK Base Station Separately: https://www.iroboup.com/service_support/video/detail/74

Robot Mower

0

2

RoboUP

RoboUP

2024/09/10 14:05

How to Install the RTK Base Station Separately?

If you're experiencing poor RTK signal quality, don't worry! We've got you covered.

In this step-by-step video guide, we'll show you how to install the RTK base station separately, ensuring optimal performance for your RoboUP mower.
00:11 Unplug the charging station cable
00:13 Disassemble the RTK base station
00:21 Connect RTK base station to extension cable
00:33 Use screws to attach RTK base station

The RTK module must be mounted on an object, such as a roof, a lawn hedge, or a pole, without any covering on top of it. You can also fix the RTK base station on the pole. The pole is not included as an accessory in the product package. If the pole is metal, the top of the pole should be lower than the fixing platform of the fixing kit. If it's a wooden or plastic pole, RTK station can be mounted on top. Make sure that there is no covering on top of the RTK module.

Robot Mower

0

4

RoboUP

RoboUP

2024/09/10 14:04

How to Install RoboUP? -Basic Installation Guide Video

Discover the essential steps for installing your RoboUP robot mower with this comprehensive installation guide video.

1. Choose a flat and open location with good Wi-Fi signal.
2. Make sure the grass on the lawn is less than 10 cm high.
3. Make sure that there is no obstacles within 2 meters around the charging station.
4. After starting the mower and entering the PIN code, pick up the mower and put it in the charging station.
5. When the RTK signal is turing solid blue from red, it's time for fixing screws.

Robot Mower

0

2

RoboUP

RoboUP

2024/04/22 14:17

How to Creat Boundaries and No-Go Zones? - Tutorials

There are two ways to create virtual boundaries for your lawn.

0:11 Auto-Mapping
Ensure the perimeter of your lawn is clear. Click the "OK" button to start the auto-mapping. RoboUP will automatically detect the edges of your lawn. Create a virtual lawn map. Once RoboUP returns to the charging station, click "OK" to save the map. The height of the cutting disc can be adjustable. If your lawn experiences the following conditions, it is recommended to create boundaries manually.

01:03 Unclear lawn perimeter
01:08 Lawn has steps or cliffs
01:13 Need to set non-mowing areas such as swimming pools, flower beds, etc.


01:23 Manual Mapping
The lawn is flat, and there are no obstacles within a 2-meter radius of the charging station. Remove the ruler from the box and attach it to the robot. Click the "boundary" button in the RoboUP app. RoboUP calibrates and exits the station automatically.


02:19 Creating No-Go Zones
Click the "No-go zone" button in the RoboUP app. Remote control the robot near the no-go zone. The no-go zone should be set outside the radius of 2 meters from the charging station. When mapping no-go zones, make sure the mower does not touch the virtual map boundary.


02:51 Creating Passages
Multiple disconnected mowing areas require passage such as front and back gardens. After completing the mapping of two or more zones, create passage to link different areas. Click the "Passage" button in the RoboUP app.

Robot Mower

0

2

RoboUP

RoboUP

2024/04/18 23:29

Device Interface Tutorial Part 3: Checking the Device Information

Check out the third tutorial video on RoboUP's user interface! Learn how to check the information of the device.

00:04 How to unlock the mower?

00:17 How to enable Wi-Fi?

00:35 How to reset to factory settings?

01:21 How to check device information?


Robot Mower

0

0

RoboUP

RoboUP

2024/04/18 08:43

Device Interface Tutorial Part 2: Mastering the Basics

Master the basics now with RoboUP! Smoothly power On and Off, enter pin codes, and discover the magic of Auto-Mapping. Short press and long press through it all. With these instructions, you can adjust the cutting height and ensure a smooth return to the charging station with ease! Start learning now so you'll become a master in no time!

00:04 How to power on?

00:22 How to power off?

00:36 How to start auto-mapping?

00:51 How to start mowing?

01:00 How to adjust the cutting blade height with buttons?

01:23 How to return to charging station after mapping?

01:40 How to return to charging station before mapping?


Robot Mower

0

1

RoboUP

RoboUP

2024/04/17 21:34

Device Interface Tutorial Part 1: Introduction of Buttons

Check out the first tutorial video on RoboUP's user interface! Learn how to check the information of the device.
00:04 How to unlock the mower?
00:17 How to enable Wi-Fi?
00:35 How to reset to factory settings?
01:21 How to check device information?

Robot Mower

0

1

RoboUP

RoboUP

2024/04/16 17:59

Unboxing the New Era of Mowing: Discover the Excitement of RoboUP TM01

Join us in this exciting unboxing video as we unveil the RoboUP TM01, the ultimate solution for effortless and precise lawn care. Stay tuned for an in-depth review and demonstration videos.

Robot Mower

0

0